I’m a web developer for more than 10 years now, and I know how hard it would be to work on more serious projects without using third-party libraries.
This is why I love them so much, and in this article, I’m going to share one of my recent findings.
A gem that I deem very helpful for profile photos on a website such as a forum or LMS (learning management system), although this plugin is so much more.
It’s a paid JS plugin, but for a very good reason.
Let’s see how we can save a ton of time in the development process by using this neat image editor, compatible with most of the development stacks out there.
What is Pintura?
Pintura is an image editing tool, packed with so many great features that I don’t know where to start first.
In fact, the scope of this article simply can’t hold the number of possibilities that this plugin provides, so I’ll try focusing briefly on the main features and showing some quick examples.
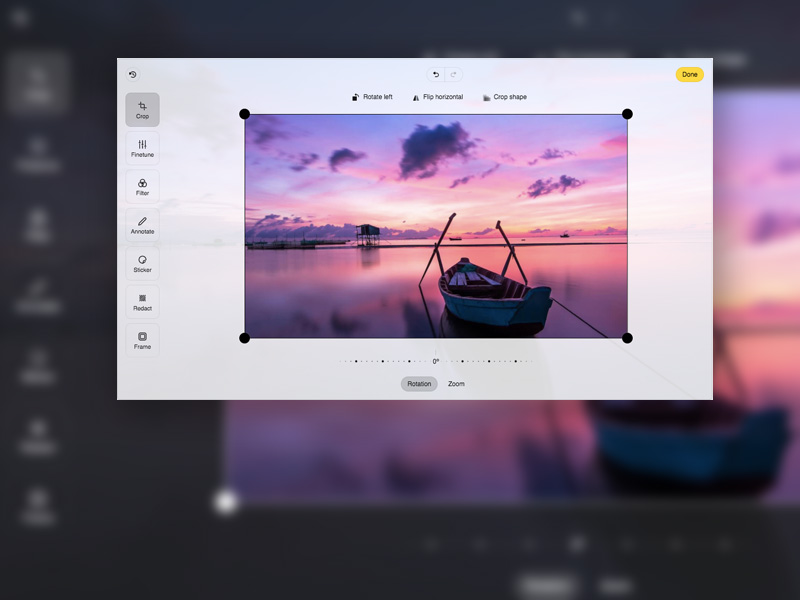
In a nutshell, Pintura is a robust JS image editor, allowing you to crop, resize, rotate, apply filters, or fine-tune your images.
Pintura also supports annotation, stickers (including custom ones), removal of sensitive information from the photos (such as location), enforced crop ratio, and others.
It is responsive and works on both desktops and mobiles, very lightweight and fast to use.
And while you as a website owner can use it for your own website or project, this tool is perfect for developers.
Yes, this library is self-sufficient and can be used on your website as an image editor (check this website for example), but the real power comes in accessibility for developers and the support for a wide range of development platforms.

Should you try Pintura for your own project?
While I always encourage fellow devs to shake their heads and make the best of any tool they are trying to build, certain things are best when implemented.
I mean, if you want to build your own image editor tool, you can do that, but it can take months, especially if you need more than 1-2 features that Pintura provides.
Plus, you need to test on different devices and cover a wide range of use cases, which basically takes a solid team and a solid amount of time.
But what if you’re a solo rider?
Or if your team is working on a large-scale project, yet you want or need to make it better when it comes to image processing?
This is where Pintura comes in really handy.
The pool of use cases is rather deep, but you can think of it like this:
When you need a photo fitting certain criteria in your project, Pintura makes it effortless.
Profile photos in a certain size or ratio, filtered and styled featured images, equal images for slides, galleries, or carousels, and a website where you can strip all the privacy information from a photo… are just some of the many possibilities.
So, although someone with no coding experience can use it, Pintura shows real strength when used by developers.
It saves time and provides an elegant solution for image editing on the fly, whether automatically in the code or by allowing website users to fulfill a certain requirement or just make their photos more appealing!
We will cover the usage basics in the next section, but keep in mind that Pintura can be used in plain JS, jQuery, React, Vue, Angular, Svelte, and around 15 other frameworks.

Adding Pintura to your project
As mentioned a few times already, Pintura can be implemented in many frameworks, but to keep things simple I’m going to show you how to use the Pintura input field.
Pintura input field is a tiny wrapper over the <input type=”file”> field.
In other words, by using the Pintura input field, you will get a file upload button in HTML, but constrained to images and packed with a powerful set of options to process the image.
Once you have your account and license ready, simply log in to the dashboard and download the package.

Click on your license and download the latest release:

Unpack the Pintura archive and you will get a folder structure like this:

The locale folder contains translation files for various languages and is very useful if you need to use Pintura on a non-English project.
The packages folder contains packages for embedding Pintura in various development stacks, and the presets folder is a collection of examples on how to use Pintura in 20 different frameworks:

To locate the example we’re going to test, open the “pintura-input” folder:

As you can see, this example also contains a “pintura-input” folder, which consists of one JS and one CSS file, that power the Pintura input field.
We also have a favicon, one image for a test, and the index.html file that combines them all.
The demonstration should start working as soon as you start the index.html file:

What can we do with the Pintura input field?
As mentioned above, the Pintura input field can be used for any of your image processing needs, either predefined or based on visitor input.
Let’s say we have an LMS website where students can enroll in courses and get a certificate.
Such LMS needs profile photos of students, shown in various sections of the website, and also in the certificate.
To keep the design and layout consistent, we want each profile photo to be 256×256 pixels, but standard solutions do come with certain cons.
You can force the students to do it themselves on their PC, and then upload the proper photo.
Or use CSS to tweak photos on the fly or PHP to crop the photos as desired.
But instead of forcing students to do external work and research for the best tool, having to deal with the distortion that CSS brings or weirdly cropped photos in PHP, you can just use Pintura.
For this example, we are going to use a free stock photo from Unsplash:

The photo itself is beautiful, no questions about that, but for our needs, there are two big problems:
- It’s not in the desired proportion or dimensions of 256×256
- It’s actually 3744×5616 pixels, which is very big and gives a total size of 1.36MB.
Let’s go back to our example and see how Pintura can help:
<style> /* The empty state grey box */ pintura-input.base [data-empty] { display: flex; align-items: center; justify-content: center; background-color: #eee; } /* To make each state equal size */ pintura-input.base [data-empty], pintura-input.base img { width: 400px; height: 300px; object-fit: cover; }
</style>
<pintura-input class="base" src="image.jpeg" name="my_field" image-crop-aspect-ratio="4/3"> <template> <div data-empty data-drop> <p> Drag & Drop your image here or <button type="button" data-browse>Browse</button> </p> </div> <div data-load> <img src="image.jpeg" width="300" alt="" /> <div> <button type="button" data-remove>Remove</button> <button type="button" data-edit>Edit</button> </div> </div> <output data-process> <img src="{url}" width="300" alt="" /> <p role="status">"{filename}" saved</p> <div> <button type="button" data-remove>Remove</button> <button type="button" data-edit>Edit</button> </div> </output> </template>
</pintura-input>As you can see in the code above, this part defines our Pintura input field, along with options to display, change or remove the image.
In order to tweak this example to our needs, we need to do just a few things:
Change the aspect ratio from:
image-crop-aspect-ratio="4/3"to:
image-crop-aspect-ratio="4/4"This will make sure that our profile photos are cropped as squares, without students needing to guess the right proportion.
In order to properly show the image on the front end, we also need to change the image HTML width attribute so it matches our needs of 256×256:
<img src="image.jpeg" width="300" alt="" />
<img src="{url}" width="300" alt="" />
to:
<img src="image.jpeg" width="256" alt="" />
<img src="{url}" width="256" alt="" />
We also want to tweak the CSS for the same reason:
/* To make each state equal size */
pintura-input.base [data-empty], pintura-input.base img { width: 256px; height: 256px; object-fit: cover;
}
and finally, we want to set the output image to be resized to 256×256 pixels, which will save us a ton of bandwidth on the server and also make it easy for web browsers to process the image in any template of our LMS:
<script> window.PinturaInput = { imageWriter: { targetSize: { width: 256, height: 256, }, }, };
</script>
In the end, the code should look like this:
<style> /* The empty state grey box */ pintura-input.base [data-empty] { display: flex; align-items: center; justify-content: center; background-color: #eee; } /* To make each state equal size */ pintura-input.base [data-empty], pintura-input.base img { width: 256px; height: 256px; object-fit: cover; }
</style>
<script> window.PinturaInput = { imageWriter: { targetSize: { width: 256, height: 256, }, }, };
</script>
<pintura-input class="base" src="image.jpeg" name="my_field" image-crop-aspect-ratio="4/4"> <template> <div data-empty data-drop> <p> Drag & Drop your image here or <button type="button" data-browse>Browse</button> </p> </div> <div data-load> <img src="image.jpeg" width="256" alt="" /> <div> <button type="button" data-remove>Remove</button> <button type="button" data-edit>Edit</button> </div> </div> <output data-process> <img src="{url}" width="256" alt="" /> <p role="status">"{filename}" saved</p> <div> <button type="button" data-remove>Remove</button> <button type="button" data-edit>Edit</button> </div> </output> </template>
</pintura-input>That wasn’t hard, was it? Now let’s see if we assembled everything properly.
Let’s go to the Pintura Input Base Template section and remove the photo by clicking on the remove button:

This will remove the default image and allow us to upload any image that we want:

Simply click the browse button and choose a profile photo, or just drag and drop it.
This will trigger the Pintura interface, and allow the student to tweak their photo:

As you can see, the crop board is locked into a 4×4 proportion, so all we need to do is to move it around a bit to get the desired part of the image:

And just for a sake of showing some more features, let’s apply some filters to the photo:

Keep in mind that there are many filters and tweaks that can be applied, but also disabled if you want to be very specific on what kind of changes are available for this profile photo.
And that’s it. Once done, click the yellow “Done” button in the top right corner, and your new photo will be ready:

How awesome is this!
In just a few tweaked lines of code, we managed to allow our students to upload their profile photos in a neat way.
Furthermore, we easily enforced the needed rules, making usage of this image a breeze in our system.
And we saved a ton of bandwidth and processing power while browsing!
While the original image was 3744×5616 pixels and 1.36MB, the resulting image is in the desired 256×256 resolution and just 20KB in size.
Final thoughts on Pintura
While the Pintura editor is very easy to use and implement, it comes packed with a powerful set of features.
Combine that with a beautiful GUI and support for most of the environments out there, and we can tell this is a big-time saver and a UI asset to make your projects shine.
The blend of possible constraints and uploader freedom makes the opportunities rather unlimited.
While some may fall into thinking that this tool is mostly targeted to projects that deal with galleries and similar media, this tool can actually vastly improve any project that requires a photo to be uploaded, and also make the image processing easier for developers.
I highly encourage you to test it out and believe that you will fall in love as I did.
Written by Stefan Ristic


